N-Button Pro/Lite supports Advanced Customized Button. It allows you to add multiple actions to one button. That is you just click ONE button, the button will control your device or devices continuously according to the pre-setting actions.
Here is the example for how to control 8-channel relay board work as below.
Relay 1 On for 5 seconds;
then Relay 2 On for 5 seconds;
then Relay 3 On for 5 seconds;
…
and then Relay 8 On for 5 seconds
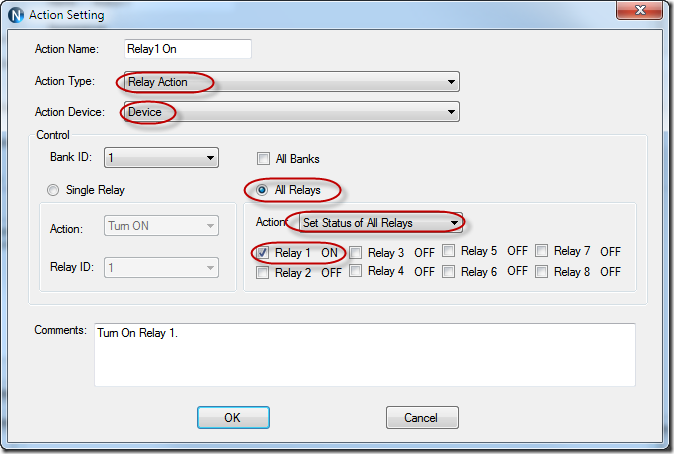
In order to turn on/off the relays accurately, it’s better to set the relay’s status at the same time.
Here are the steps to create One Button including about actions.
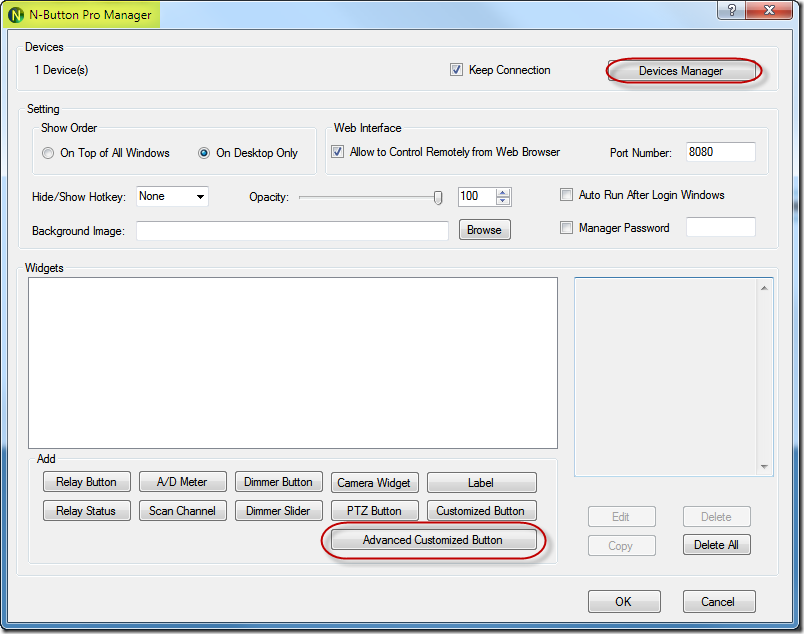
1. Download N-Button Pro, install and launch it to get the N-Button Pro Manger panel. Add the connected relay board by clicking Devices Manager.
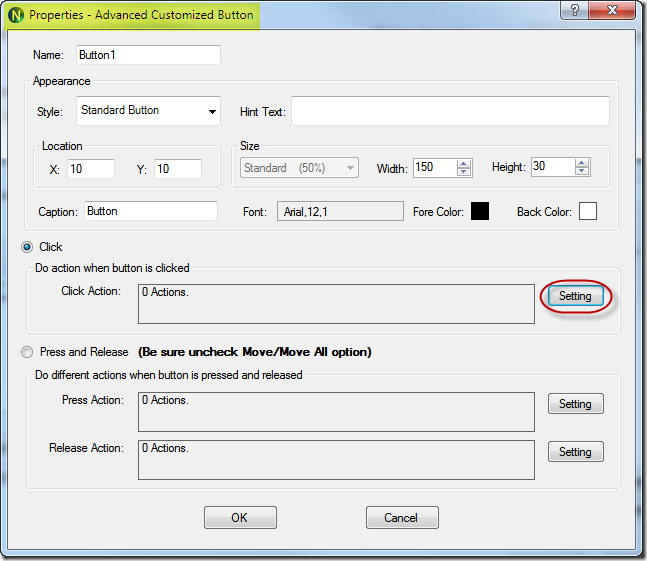
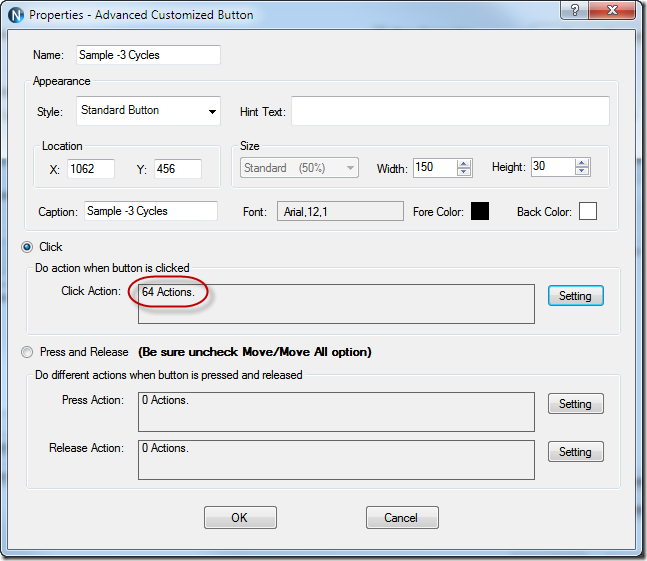
2. Click Advanced Customized Button to show the Properties panel for Advanced Customized Button.
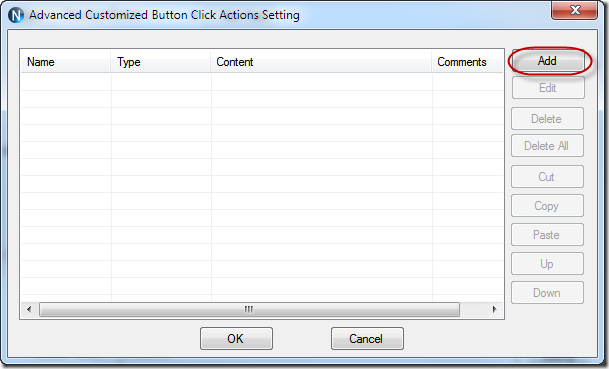
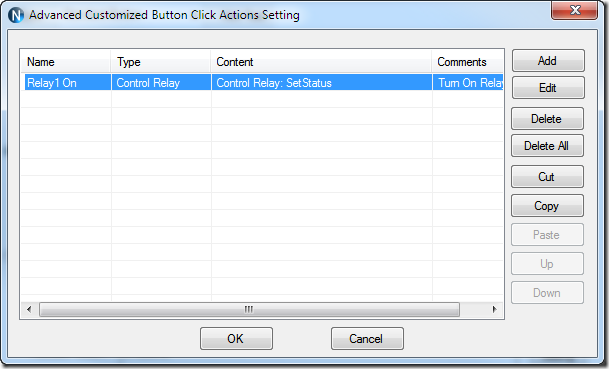
3. Click Setting to show Advanced Customized Button Click Actions Setting panel.
4. Click Add to show Action Setting panel. Here is the setting for Relay1 On. Be sure to select the right device.
5. Click OK to finish the setting and back to the previous panel.
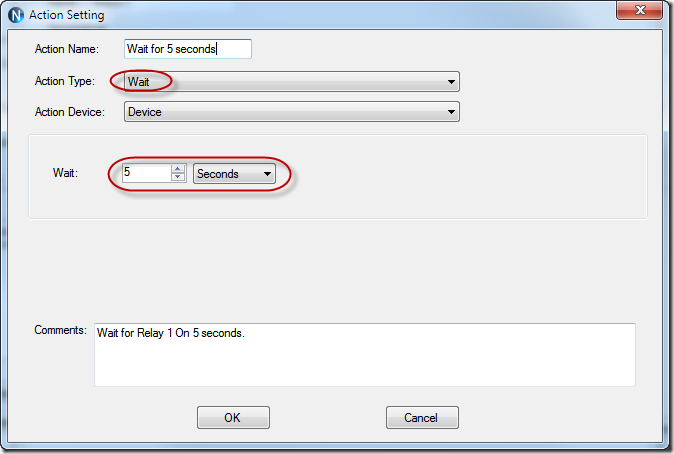
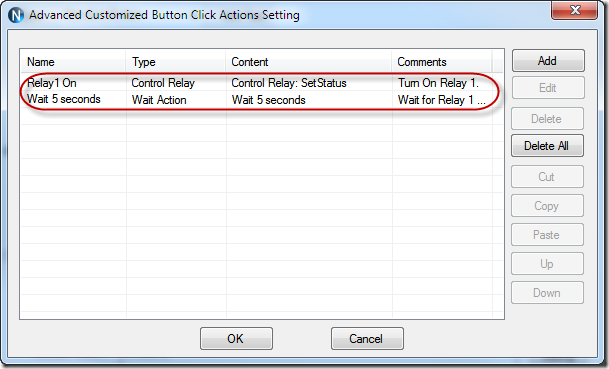
6. Click Add to show Action Setting panel again to add waiting action.
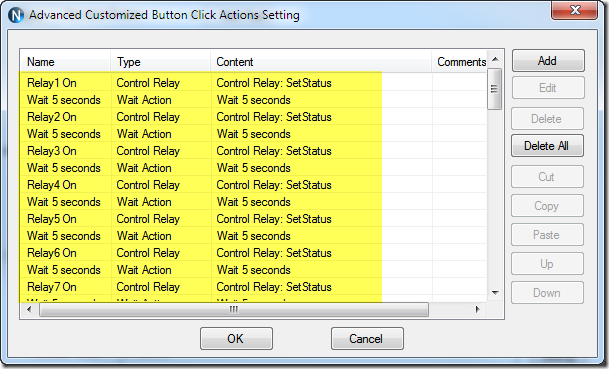
7. Continue to add actions for other relays and waiting actions, or you just Copy and Paste the added item and then Edit it. More actions can be added following the above steps.
8. Click OK to return to the Properties panel. Here 64 actions are 3 cycles control for the requirement.
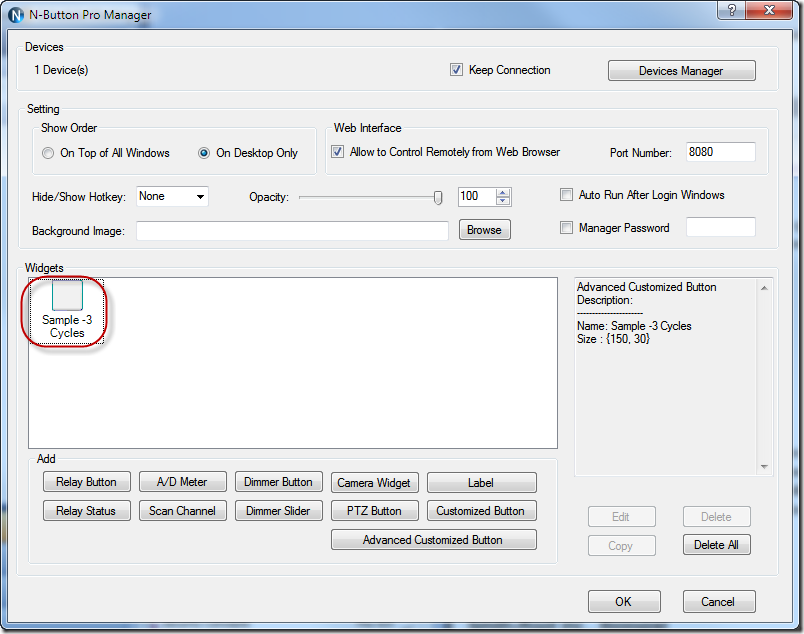
9. Click OK to return to N-Button Pro Manager panel.
10. Click OK, the button will show on you desktop.
Click the created button to control relays continuously and accurately!
Download the configuration file for the above 3-cycle setting. You just need to Import Config File (.nbc file) by right click N-Button Pro icon on your Windows status bar.

