N-Button Lite/Pro supports condition feature, which allows you to control relays or other devices automatically according to the conditions meet or not meet. Here is the example for how to use condition feature.
Task: Turn on Relay 1 on a relay board, only if Channel 1 AND Channel 2 on scan board are closed.
Step 1: Install N-Button Lite or Pro, and connect relay board and scan board with computer. (Get relay board and scan board from National Control Devices)
Step 2: Run N-Button, add the relay board and the scan board to Devices Manager.
Step 3: Add Scan Channel widgets and Relay Button widget to test the connection. Be sure the widgets will change when you control or change the boards.
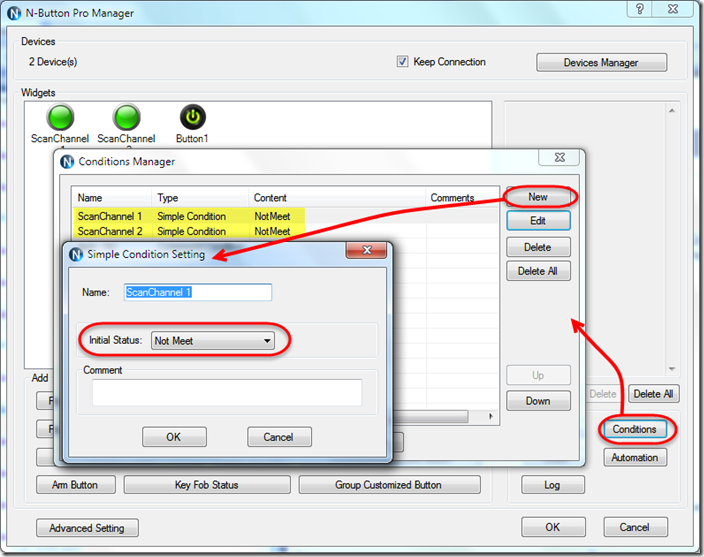
Step 4: Click Conditions button to open Conditions Manager. Add two Simple Condition for Scan Channel 1 and Channel 2 separately. Set the Initial Status to Not Meet.
Step 5: Add a Compound Condition, which includes previous two Simple Conditions for both scan channels. Select Meet All means, Compound Condition status will be Meet only if both Simple Conditions’ status are Meet.(Both Initial Status are set Not Meet)
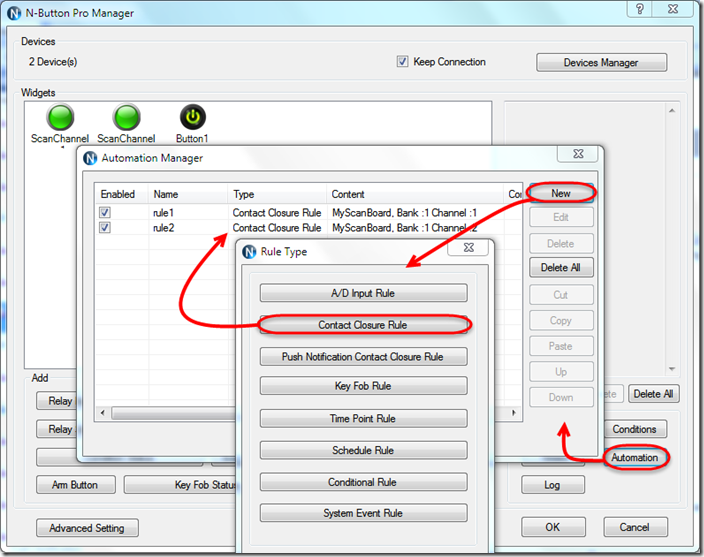
Step 6: Click Automation button to open Automation Manager. Add Contact Closure Rule for scan channel 1 and 2 separately.
On Contact Closure Rule panel, scan channel needs to be selected first, and the Condition Action also needs to be set when the scan channel status changes. Here, set rule1 for scan channel 1 and set rule2 for scan channel 2, once the channel is closed, the condition is set to Meet.
Step 7: Add a Conditional Rule on Automation Manager panel.
Here are the settings for Conditional Rule panel. The compound condition Both needs to be selected, and the actions when condition status Meet or Not Meet need to be set also.
After all above Automation settings, N-Button will control Relay 1 automatically according to the status of scan channel 1 and channel 2.
See also:
N-Button Automation Control Device with Key Fob


