|
How to
Install PTZ Controller PPC
1. Required Hardware
The following is the minimum hardware that is required to run PTZ Controller PPC:
-
Pocket PC 2003 or later
-
Microsoft ActiveSync and synchronization hardware for application
installation
-
RS232 serial adaptor cable suitable to connect the Pocket PC
with a standard DB9 serial port on the peripheral devices (PTZ dome)
About the serial adaptor cable, one solution is a Compact Flash to Serial adaptor
such as the Serial I/O CF Card manufactured by Socket. Another option is to obtain
a serial adaptor that connects directly to the synchronization port of the Pocket
PC.
2. To install PTZ Controller PPC
-
Connect the Pocket PC to the desktop PC and ensure that ActiveSync
is operating correctly.
-
Run PTZ Controller PPC setup executable file on your desktop
PC and follow the installation wizard to finish intalling.
Another way to install PTZ Controlle PPC:
-
Copy Relay Time PPC setup *.cab file from desktop PC to Pocket
PC.
-
Run the *.cab file on Pocket PC to finish intalling.
How to Select Protocol
Click Option -> Protocol to select a protocol.
PTZ Controller PPC supports standard Pelco D protocol, Pelco P protocol, AD protocol,
Bosch protocol and Sony protocol. The default protocol is Pelco D.

How to Select COM Port
Click Option-> COM Port to select an existing
COM Port.
All available COM ports will be detected automatically and list here. The default
port is "COM1".
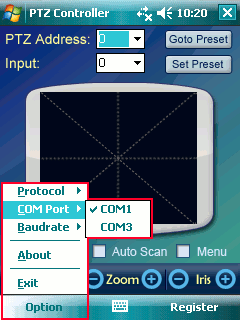
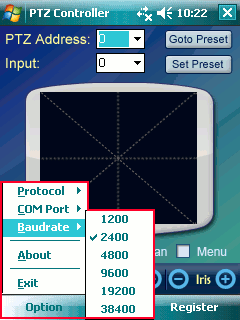
How to Select Baudrate
Click Option -> Baudrate to select baudrate
for the COM port. The default baudrate is "2400".
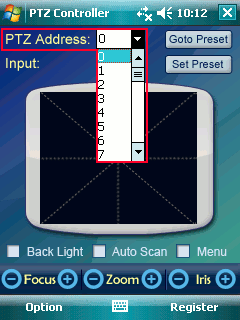
How to Select PTZ Address
Click PTZ Address ComboBox to select an Address for PTZ camera.
The default PTZ Address is "0".
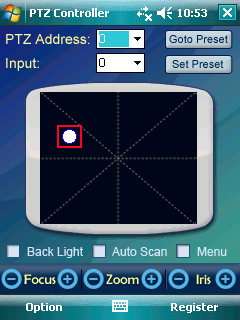
How to Move Camera
Touch the Moving Area, a white dot will
be shown as below. The PTZ camera will rotate at a specified speed which is determined
by the location of the white dot in the Moving Area.
Note: Center point is the Zero point which means center point get
zero speed. The more the white dot position far away from the Zero point, the faster
the rotate speed. The more the position near to the Zero point, the slower the rotate
speed.
How to Preset Position
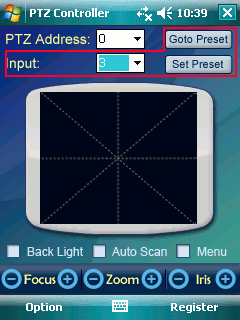
Move the camera to the position you want.
Select a number in Input ComboBox. (Not all numbers
are available, some numbers have been used by other functions, for example, 95 is
to open menu for most of PTZ Cameras.)
Click Set Preset button to remember this position.
When you want to go to the same position again, just input the same number you have
input above, and click GoTo Preset button.
How to Use Back Light
Click Back Light CheckBox to open or close Back Light of PTZ camera.
The default Back Light is close.

How to Use Auto Scan
Click Auto Scan CheckBox to open Auto Scan panel.

Click the Direction button to select clockwise or anticlockwise
direction for Auto Scan. PTZ Camera will rotate continually according to the selected
direction.
Drag the Slide to select the speed of Auto Scan.
Click Start button to run Auto Scan.
Click Stop button to stop Auto Scan.
Click Close button on top right to close Auto Scan panel.
How to Use Menu
Click Menu CheckBox to open Menu panel.

Click Menu button to show OSD (on-screen display) Menu of PTZ Camera.
Click Up, Down, Left and
Right button to operator the PTZ Camera Menu options.
NOTE:
Menu function is not a standard rule for every type of PTZ camera.
If you meet problem about it, please feel free to contact us.
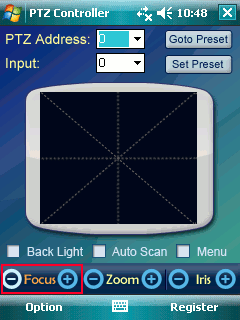
How to Use Focus
Click the Focus Button to focus far or focus near for PTZ camera.
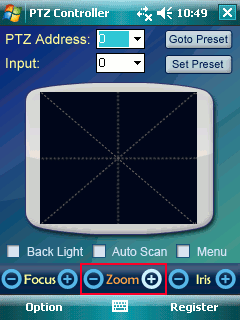
How to Use Zoom
Click the Zoom Button to zoom out or zoom in for PTZ camera.
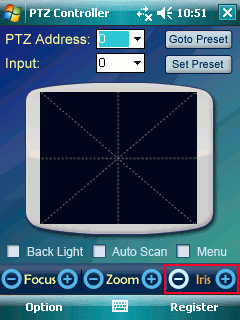
How to Use Iris
Click the Iris Button to open Iris or close Iris for PTZ camera.
|


