|
Serial Port Tool focuses on COM Port communication software for RS232 related works.
|
||||||||||||||||||
|
Quick Timer High User Manual
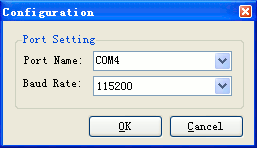
1. How to Set COM Port |
||||||||||||||||||
|
||||||||||||||||||
|
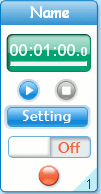
2. How to Turn On/Off Relay Manually
|
||||||||||||||||||
|
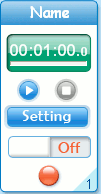
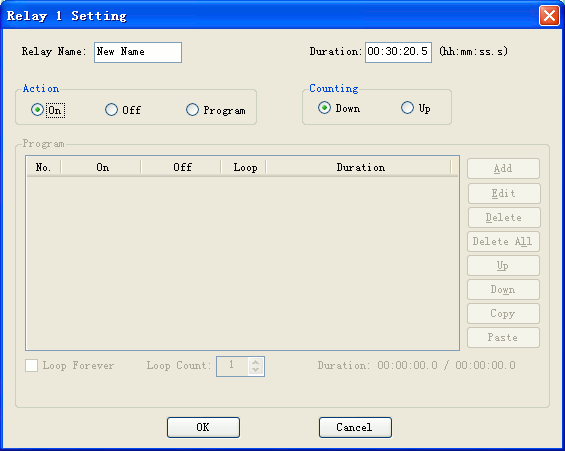
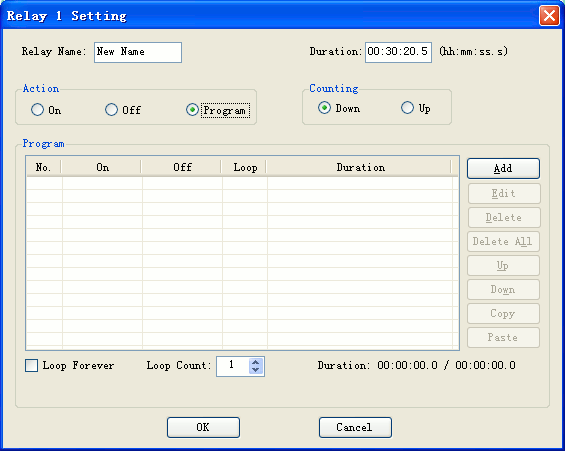
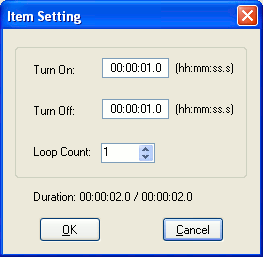
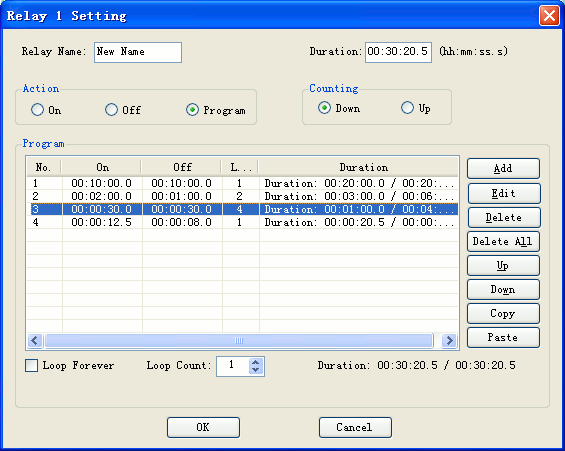
3. How to Turn On/Off Relay Automatically
|
||||||||||||||||||
|
||||||||||||||||||
|
|